
Last week, I was working on security profiles for the charger backend. They run on the same TLS/SSL certificates as the web.
SSL: A Guardian Angel in Cyberspace
Imagine SSL as your internet guardian angel, ensuring your sensitive data doesn’t fall into the wrong hands. It’s like wrapping your digital messages in a virtual envelope with cryptographic kisses, ensuring that only the intended recipient can unlock its secrets. So, the next time you’re typing in your credit card details or password for that cooking site, remember to thank SSL for keeping prying eyes at bay.
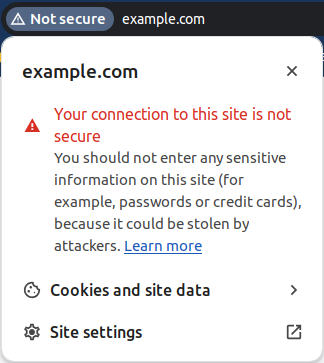
Modern browsers do a great job highlighting that a site might not be using SSL. You can see a full-screen message about the site’s insecurity or these corner warnings.
Rule of Two
Let’s look at the genius workings of SSL/TLS.
- Client – Browser in website context – reaches out to server under domain example.com
- The server behind that domain responds with its public key or certificate
- The client then verifies the public key with somebody they trust – the Central Authority (CA).
- If all checks out, the client can encrypt data using the public key so that only the holder of the private key can decrypt and read it.
- Encrypted messages can pass through unsecured wild-west called the Internet.
- The server receives the message and decrypts it with its private key.
Who do you trust?
Now, the critical part is the Central Authority. Otherwise, anyone can claim that they are the correct server behind example.com. So, say somebody installs a fake Wi-Fi “FreeInternet” router and routes all the traffic to example.com to their own server.
The attacker could then provide any public key for which they have the private key, and the client would have no idea.
This is why validating the entity that generated and signed the certificate is necessary. The most common (and free) CA in the space is Let’s Encrypt
Minting Certificate
There is an automated process for getting the certificate from Let’s Encrypt and others. This protocol is called ACME.
In essence, a server needs to prove to the CA that it controls a domain (example.com) before it gives it the certificate. The server must pass one of the challenges the CA supports to provide proof.
The most common one is http-01, where during the automated negotiation, the server needs to serve a specific JSON on a specific URL. So imagine something like example.com/.well-known/test. This is the most used method as it is fast! The con here, though, is that the server needs to be reachable from the Internet on the example.com domain, so there is no testing in development—all needs to happen in production.
An alternative method is dns-01. It is a similar concept, but we publish a DNS record instead of opening up a route on the HTTP server. This is great as this can happen from the dev environment or anywhere, as long as we have a programmatic way of creating DNS records. The big downside, though, is that DNS, in general, takes a long time (up to hours) to propagate.
Storing Certificates
Traditionally, certificates are written to a file and stored on the web server. This is fine, but I tend to work with many serverless applications where there is no persistent drive to store stuff.
Then, we need to store the values in our database. Using a database for storage has many benefits, as we can easily share the certificates between multiple instances or quickly tear down and redeploy functions or containers without the need to reprovision certificates. The downside is that we might need to write our implementation of the ACME flow.
When implementing it, I first started with Greenlock, which turned out to be too cumbersome to add my own storage strategy. Overall, I found it difficult to work with if I wasn’t going to do exactly what the default path is.
Then I tried acme-client, which sounded like a slightly lower abstraction level but turned out to work great. Here is the gist of the code I wrote to support it.
const accountPrivateKey = await this.getOrGeneratePrivateKey();

const client = new acme.Client({
    directoryUrl: acme.directory.letsencrypt.production,
    accountKey: accountPrivateKey
});
const [certificateKey, certificateRequest] = await acme.crypto.createCsr({
    commonName: DOMAIN,
});

const certificate = await client.auto({
    csr: certificateRequest,
    email: MAINTAINER,
    termsOfServiceAgreed: true,
    challengeCreateFn: async (authz, challenge, keyAuthorization) => {
        return new Promise<void>((resolve) => {

            this.challangeHttpServer = http.createServer((req, res) => {
                res.end(keyAuthorization);
            });

            console.log('Starting challange server');

            this.challangeHttpServer.listen(fileConfig.port, () => {
                console.log('Challange server is up', fileConfig.port);
                resolve();
            })
        })
    },
    challengeRemoveFn: async () => {
        return new Promise<void>((resolve) => {

            console.log('Stoping challange server');

            this.challangeHttpServer?.close(() => {
                console.log('Challange server is down');
                resolve();
            });
        })
    }
});
Note that after this code runs, I get both certificate (public key) and certificateKey (private key) in variables so I can do and store them where I see fit.